
Adding a disk to fstab safely, with tui-disk
A line in /etc/fstab that does not parse is a boot that stops in an emergency shell. tui-disk picks the device by UUID, checks the staged file with findmnt before you are asked, shows the one-line diff, and then reads the drive's health and the btrfs state back.
Everything below was run on 2026-10-07 with
tui-disk v0.1.4
on an Ubuntu 24.04 machine, except the drive health screen, which was read on
a laptop with two SATA SSDs. The screens and dialogs are copied from the
terminal, without the dialog borders; nothing in them was retyped. The
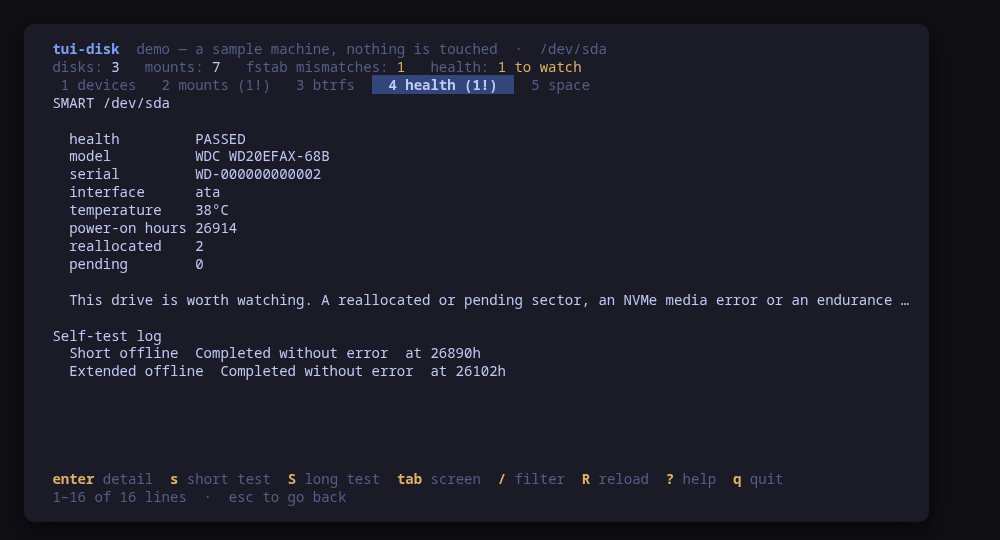
screenshot is the tool’s own, from --demo.
The disk in the walk-through is a practice one: a 1 GB file attached as a loop device and formatted btrfs, so that every change on this page can be tried without a spare drive and undone in one command. A real second disk goes through exactly the same screens.
Install and open it
$ sudo apt install tui-diskThe repository setup is on the install page. Most reads need no
privileges; the few that do (blkid, some btrfs reads, smartctl) are tried
plain and retried with sudo -n, which never prompts, so run sudo -v in
another terminal first, or start the tool with sudo.
A practice disk
$ truncate -s 1G /var/tmp/practice.img
  sudo losetup -f --show /var/tmp/practice.img
  sudo mkfs.btrfs -q -L practice /dev/loop0
sudo mkdir -p /mnt/practicelosetup prints the device it picked; it was /dev/loop0 here. Screen 1,
the device tree, shows it with its filesystem and no mount point:
disks: 2   mounts: 25   backend: util-linux 2.39.3
NAME                             SIZE     FSTYPE    USED            MOUNTPOINT                     HEALTH
loop0                            1G       btrfs
sr0                              366K     iso9660
vda                              20G                                                               hdd · virtio
└─vda1                           19G      ext4      █········· 10%  /
└─vda14                          4M
└─vda15                          106M     vfat      ·········· 6%   /boot/efi
└─vda16                          913M     ext4      ·········· 7%   /boot
vdb                              4G       btrfs     ·········· 0%   /srv/data                      hdd · virtio
Add it to fstab (a)
a starts with the device, picked from a list by label and UUID rather than
typed:
Which device?

/dev/sr0  iso9660  [cidata]  2026-10-07-00-38-03-00
/dev/vda15  vfat  [UEFI]  103C-DA09
/dev/vda1  ext4  [cloudimg-rootfs]  1bfefdfb-34c9-46c7-854f-399d0a1dea04
/dev/vda16  ext4  [BOOT]  fb8b4264-587e-4a60-a103-a1d39552f189
/dev/vdb  btrfs  cb76ad9c-02ff-45af-9a2b-e3b48d9c4962
/dev/loop0  btrfs  [practice]  0fcc49c8-4f1c-48d8-94eb-a49036593cf7
/dev/vda14
Typing practice narrowed the list, and enter opened the form with the
device written as UUID=, the one spec that survives a disk being renumbered.
The mount point was changed to /mnt/practice and the options preset to
defaults,nofail. The presets are defaults, defaults,noatime,
compress=zstd:1,noatime for btrfs, defaults,nofail, and an automount one.
nofail is the one to pick for a disk that may be absent at boot, and a loop
device always is.
enter on a text field reviews. The new file was written to a private
temporary directory, findmnt --verify ran on that staged copy, and only then
did the dialog appear:
Write /etc/fstab

findmnt --verify on the staged file: 0 parse errors, 0 errors, 5 warnings

--- /etc/fstab
+++ /etc/fstab
@@ -3,2 +3,3 @@
LABEL=UEFI /boot/efi vfat umask=0077 0 1
/dev/vdb /srv/data btrfs defaults 0 0
+UUID=0fcc49c8-4f1c-48d8-94eb-a49036593cf7 /mnt/practice btrfs defaults,nofail 0 0

Command to run:
$ /usr/bin/sudo -n install -m 644 /tmp/tui-disk-170699004/fstab /etc/fstab
$ /usr/bin/sudo -n systemctl daemon-reload
A file with a parse error never reaches this dialog. After y, every other
line of /etc/fstab was the same bytes as before, tabs included, which cat -A
confirmed; only the new line was added.
Mount it (2, then m)
Screen 2 crosses the mount table with fstab. The new entry showed as
not mounted, which is what a boot that failed to mount something looks like
too. m on it:
Mount /mnt/practice

Mount /mnt/practice as /etc/fstab describes it.

Command to run:
$ /usr/bin/sudo -n mount /mnt/practice
mount <target> and nothing more: the kernel reads the device and the options
from fstab, so what gets mounted is what the file says. The row then read:
/mnt/practice /dev/loop0 btrfs ok ·········· 1%
Check the btrfs filesystem (3, then c)
Screen 3 lists each btrfs filesystem with its allocation, subvolumes, scrub
and balance state and the device error counters. c starts a scrub in the
background:
Scrub /mnt/practice

Start a scrub of /mnt/practice in the background; it reads every block and can take hours.

Command to run:
$ /usr/bin/sudo -n btrfs scrub start /mnt/practice
On a 1 GB practice disk it finished at once:
Status:           finished
Duration:         0:00:00
Total to scrub:   304.00KiB
Rate:             288.00KiB/s
Error summary:    no errors found
On this Ubuntu 24.04 kernel, btrfs scrub status and btrfs device stats
refuse an ordinary user, and 0.1.4 did not retry them with sudo -n, so its
btrfs screen showed the scrub state as unknown and the error counters as not
read. The fix is in
tui-disk#18. On a Fedora
machine with kernel 6.19, both reads answered an ordinary user and the screen
showed them.
Drive health (4)
A loop device and a virtual disk have no SMART, and the tool says unknown
with smartctl’s reason rather than calling them healthy. On a laptop with two
SATA SSDs and smartmontools installed, screen 4 read both:
disks: 3   mounts: 40   health: 1 to watch   backend: util-linux 2.41.4 (untested)
DEVICE                              HEALTH             TEMP   HOURS    MODEL
/dev/sda                            PASSED             31°C   17526    KINGSTON SA400S37960G
/dev/sdb                            PASSED 1 pending   40°C   29247    CT1000MX500SSD4
PASSED is the drive’s own verdict. The second one carries one pending sector
next to it, and that is why the header says one drive to watch: a drive that
passes and counts damage is already working around it. smartctl -A /dev/sdb
on that machine showed the same attribute, Current_Pending_ECC_Cnt at 1.
s and S start a short or long self-test, which the drive runs itself.
Reboot, and unmount (u)
With nofail, a reboot with the loop device gone came up normally, and screen
2 showed the entry as not mounted, which is the truth. That is what
nofail is for; a boot without it and without the disk was not tried here.
u on a mounted entry unmounts it:
Unmount /mnt/practice

Unmount /mnt/practice.
Anything with a file open under it keeps the mount busy, and anything writing there stops.

Command to run:
$ /usr/bin/sudo -n umount /mnt/practice
Undo
tui-disk adds and edits fstab entries; it does not remove them. To take the
practice disk back off the machine, delete its line by hand (it is the one with
/mnt/practice), then:
$ sudo systemctl daemon-reload
  sudo umount /mnt/practice
  sudo losetup -d /dev/loop0
rm /var/tmp/practice.imgThe umount line fails harmlessly when it is not mounted.
What this does not show
- Partitioning,
mkfs, LUKS: tui-disk never does any of them. - LVM, mdadm and ZFS have no view of their own; they appear in the device tree
because
lsblkreports them. - What fills a filesystem: screen
5isdfper mount and points atncdu -x.