
A private tailnet with your own CA
A Headscale control plane with no public DNS name and no Let's Encrypt. tui-cert runs a local certificate authority, tui-tailscale serves its certificate and trusts it on each client, and machines join with pre-auth keys.
Every command on this page is the one
tui-tailscale v0.2.0
or tui-cert v0.3.0
shows in its preview dialog, taken from the tools’ READMEs and source rather
than written from memory. The tui-tailscale README records this path as run end
to end in the family lab on two Ubuntu guests, 26.04 as the control plane and
24.04 as the client, with the certificate issued for an IP address and the
client reaching the control plane by that address. The screenshots are the
tools’ own, rendered from --demo.
The names are examples: vpn.example.internal and 192.0.2.10 for the control
plane, homelab-ca for the certificate authority, tailnet.internal for the
names nodes get.
Why this shape
The public path needs a DNS name on the internet, port 443 open to Let’s Encrypt, and an identity provider that will redirect a browser back to you. A lab, a homelab or a network behind a VPN of its own often has none of those: the control plane is reached by an address, or by a name only the local resolver knows.
Headscale does not need a public certificate. It needs one its clients trust. So this page runs a small certificate authority on the control plane with tui-cert, issues Headscale’s certificate from it, and makes each client trust that CA before it joins. With no browser in the loop, machines join with pre-auth keys instead of an identity provider.
One honest note first. The Tailscale control protocol runs over Noise, so the traffic between clients and Headscale is encrypted and authenticated even over plain http, and tui-tailscale offers plain http as a real option. What https adds is a control plane that anything on the network can verify, a URL that does not look like a mistake to the next person, and a certificate you can hand to a proxy later. If none of that matters to you, plain http is the shorter path.
Install on the control plane, after the one-time repository setup:
$ sudo apt install tui-tailscale tui-cert tui-firewalland on each client, tui-tailscale, plus tui-cert if you want the CA offered
by name rather than picked as a file.
On the control plane
1. Install headscale first
In tui-tailscale, the users screen (3), i. It comes before the certificate
because the package creates the headscale account the certificate is going to
be handed to. The install is previewed as the repository setup (only if it is
missing, with the signing key’s fingerprint checked) and
apt-get install -y headscale, and it leaves the unit stopped.
2. Create the CA (tui-cert, 5, then N)
In tui-cert, screen 5 lists local CAs. N asks for a name (homelab-ca), a
key (ECDSA P-256, or RSA 3072 for an old client) and a validity, ten years by
default. The preview:
install -d -m 755 /etc/tui-cert/ca/homelab-ca
openssl req -x509 -newkey ec -pkeyopt ec_paramgen_curve:prime256v1 -nodes \
  -keyout /etc/tui-cert/ca/homelab-ca/ca.key \
  -out /etc/tui-cert/ca/homelab-ca/ca.crt -days 3650 -set_serial <random> \
  -subj /CN=homelab-ca -addext basicConstraints=critical,CA:TRUE,pathlen:0 \
  -addext keyUsage=critical,keyCertSign,cRLSign
chmod 600 /etc/tui-cert/ca/homelab-ca/ca.key
chmod 644 /etc/tui-cert/ca/homelab-ca/ca.crt
The key never leaves this machine and only root can read it. pathlen:0 means
the CA signs server certificates and nothing that could sign in turn. The
local CA guide covers the CA itself in
more depth.
3. Issue Headscale’s certificate (e)
Select homelab-ca and press e:
- common name:
vpn.example.internal; - other names:
192.0.2.10. A client that connects by address checks the address against the certificate, so the IP has to be in it; tui-cert writes it as anIP:name; - validity: 397 days, the default, never past the CA’s own expiry;
- directory: the default,
/etc/tui-cert/issued/vpn.example.internal; - owner:
headscale:headscale, so the service can read its own key.
openssl req -x509 -CA /etc/tui-cert/ca/homelab-ca/ca.crt \
  -CAkey /etc/tui-cert/ca/homelab-ca/ca.key \
  -newkey ec -pkeyopt ec_paramgen_curve:prime256v1 -nodes \
  -keyout /etc/tui-cert/issued/vpn.example.internal/privkey.pem \
  -out /etc/tui-cert/issued/vpn.example.internal/fullchain.pem \
  -days 397 -set_serial <random> -subj /CN=vpn.example.internal \
  -addext subjectAltName=DNS:vpn.example.internal,IP:192.0.2.10 \
  -addext basicConstraints=critical,CA:FALSE \
  -addext keyUsage=critical,digitalSignature -addext extendedKeyUsage=serverAuth
tee -a /etc/tui-cert/issued/vpn.example.internal/fullchain.pem
chmod 600 /etc/tui-cert/issued/vpn.example.internal/privkey.pem
chmod 644 /etc/tui-cert/issued/vpn.example.internal/fullchain.pem
chown headscale:headscale /etc/tui-cert/issued/vpn.example.internal/privkey.pem /etc/tui-cert/issued/vpn.example.internal/fullchain.pem
tee -a appends the CA’s certificate, which is public, so fullchain.pem is the
server certificate followed by the CA’s.
4. Serve it (tui-tailscale, S)
Back in tui-tailscale, S on the users screen, transport own certificate:
server_url:https://vpn.example.internal, orhttps://192.0.2.10if the clients have no name for it. A name has to resolve on every client, through your local DNS or a line in/etc/hosts;listen_addr:0.0.0.0:443.
The next step does not ask for a path. With tui-cert installed, it lists the
pairs its local CAs issued, by CA, name and expiry, read from tui-cert --check
without privilege:
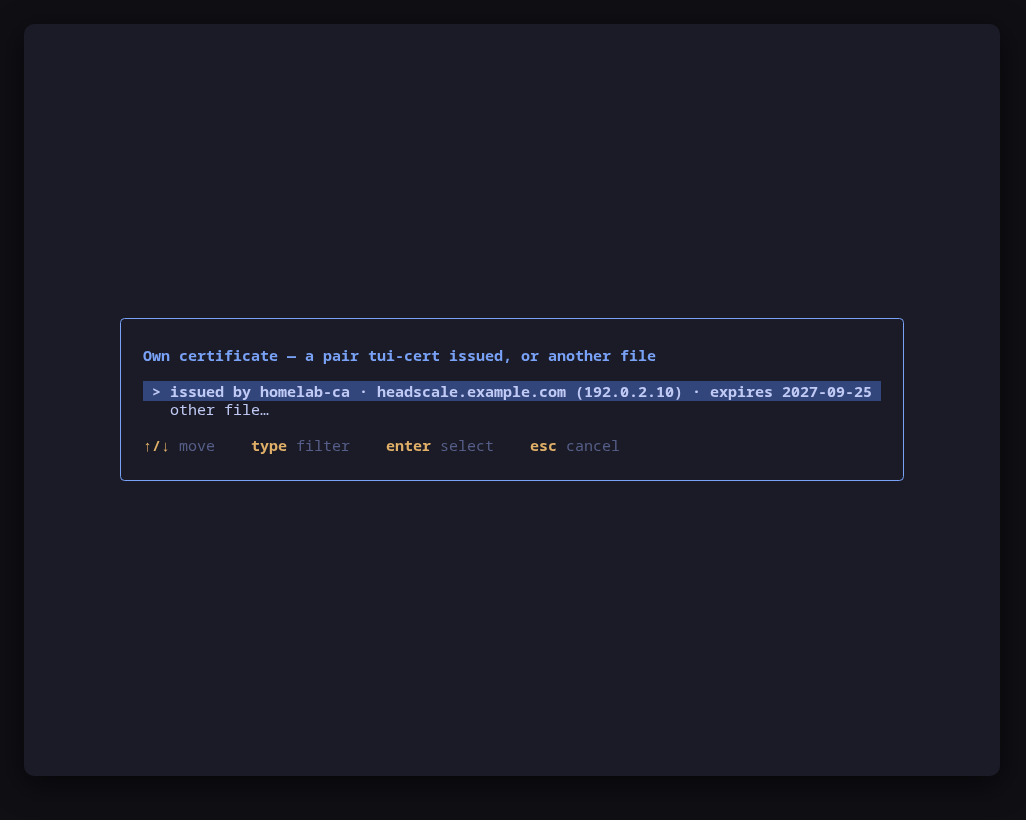
Picking one takes the certificate and its key together. Before anything is
written, the form checks from this machine that the account Headscale runs as
can reach both files and every directory above them, and refuses a pair it
cannot read, naming the file in the way. The other file entry opens a file
picker for a pair from anywhere else.
Then dns.base_domain (tailnet.internal), the diff (server_url,
listen_addr, tls_cert_path, tls_key_path, and tls_letsencrypt_hostname
emptied if the file had it), and the last confirm, systemctl enable --now headscale on a fresh install.
5. Open the ports (f)
With the unit running, the readiness line reads the host firewall and says when
443/tcp is closed, and whether 41641/udp, the port for direct connections
between nodes, is. On a fresh host this comes before the first join: with the
control port closed a client cannot reach Headscale at all. f hands the
terminal to tui-firewall to open both, and the ports are
read again when it exits. On a cloud image whose INPUT chain ends in a REJECT,
see Opening ports on a cloud image’s iptables firewall.
6. A user and a pre-auth key (n, 5, n)
Skip O: there is no browser in this setup and no identity provider to
configure. n on the users screen creates a user:
headscale users create homelabThen the preauth keys screen (5), n: pick the user by id, and add
reusable and an expiration if one key should serve several machines for the
next two hours:
headscale preauthkeys create --user 1 --reusable --expiration 2hHeadscale prints the key once. tui-tailscale shows it once, on the status line, with a note to copy it now, and keeps no copy. The list goes on showing prefixes only. A key is a credential, so give it the shortest life that covers the machines you are about to join.
On each client
7. Copy the CA certificate (tui-cert x on the control plane)
On the control plane, select homelab-ca in tui-cert and press x. The panel
shows the certificate’s path, its SHA-256 fingerprint and its expiry, and the
one line to run on the other machine. It copies the certificate only, never the
key, to the same place there:
$ ssh vpn.example.internal cat /etc/tui-cert/ca/homelab-ca/ca.crt \
| sudo install -D -m 644 /dev/stdin /etc/tui-cert/ca/homelab-ca/ca.crtReplace vpn.example.internal with however the client reaches the control plane
over ssh. Then compare the fingerprint with the one the export panel shows,
before you trust anything:
$ openssl x509 -noout -fingerprint -sha256 -in /etc/tui-cert/ca/homelab-ca/ca.crt8. Join, trusting the CA on the way (tui-tailscale i, then j)
In tui-tailscale on the client, i installs Tailscale, then j: login server
https://vpn.example.internal, the pre-auth key, a hostname if you want one,
and accept routes if the control plane serves a subnet.
Before it runs tailscale up, the join checks the login server’s certificate
against this machine’s trust store, with a curl of /health on the server.
This client does not trust homelab-ca yet, so the check fails, and instead of
letting tailscale up fail with a TLS error the join stops at a CA step. With
tui-cert installed it offers the CAs tui-cert keeps here, homelab-ca among
them; without it, a file picker opens in /etc/tui-cert/ca.
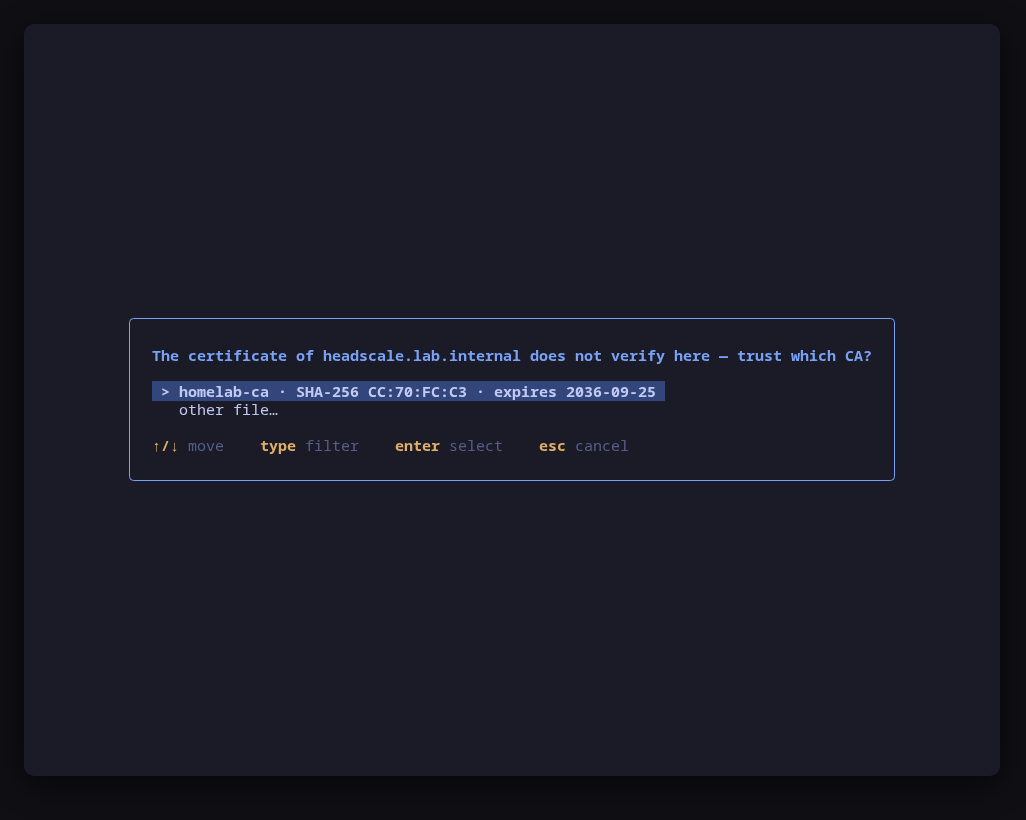
The CA you pick is previewed as the distribution’s own way of adding a trust
anchor, followed by a restart of tailscaled, because a running daemon keeps
the roots it loaded at start:
| Distribution | Trust step |
|---|---|
| Debian, Ubuntu | install -m 644 <ca> /usr/local/share/ca-certificates/tui-tailscale-<host>.crt, then update-ca-certificates |
| Fedora, RHEL | install -m 644 <ca> /etc/pki/ca-trust/source/anchors/tui-tailscale-<host>.crt, then update-ca-trust |
| Arch, Omarchy | trust anchor --store <ca> |
The dialog also says what trusting a CA means, and it is worth reading: every
program on this machine that uses the system trust store will trust whatever
homelab-ca signs, not only the control plane. That is why the CA key stays on
one machine at mode 600. A certificate that is trusted but issued for another
name is reported as such, because no CA fixes a wrong name.
Then the join goes on, previewed as one dialog:
install -m 600 /dev/stdin /run/tui-tailscale.authkey
tailscale up --login-server=https://vpn.example.internal --authkey=file:/run/tui-tailscale.authkey --accept-routes --timeout=20s --reset
rm -f /run/tui-tailscale.authkey
The key is on no command line, not even in the dialog. It travels on the
standard input of install into a root-only file on a tmpfs, tailscale reads it
from there, and the file is removed afterwards whether the join worked or not.
Join again without the questions
A machine that is being set up tends to leave and rejoin: a logout to test a
fresh join, a new key, a move to another control plane. After a join with new
answers, tui-tailscale offers to save them as a join profile. Type a name, say
homelab, and the save is a previewed write of /etc/tui-tailscale/config.toml
(or ~/.config/tui-tailscale/config.toml when not root), shown as a diff. The
table it adds, for a client that joined with routes accepted and advertises
nothing:
[[profile]]
name = "homelab"
login_server = "https://vpn.example.internal"
hostname = ""
accept_routes = true
advertise_routes = []
advertise_exit_node = false
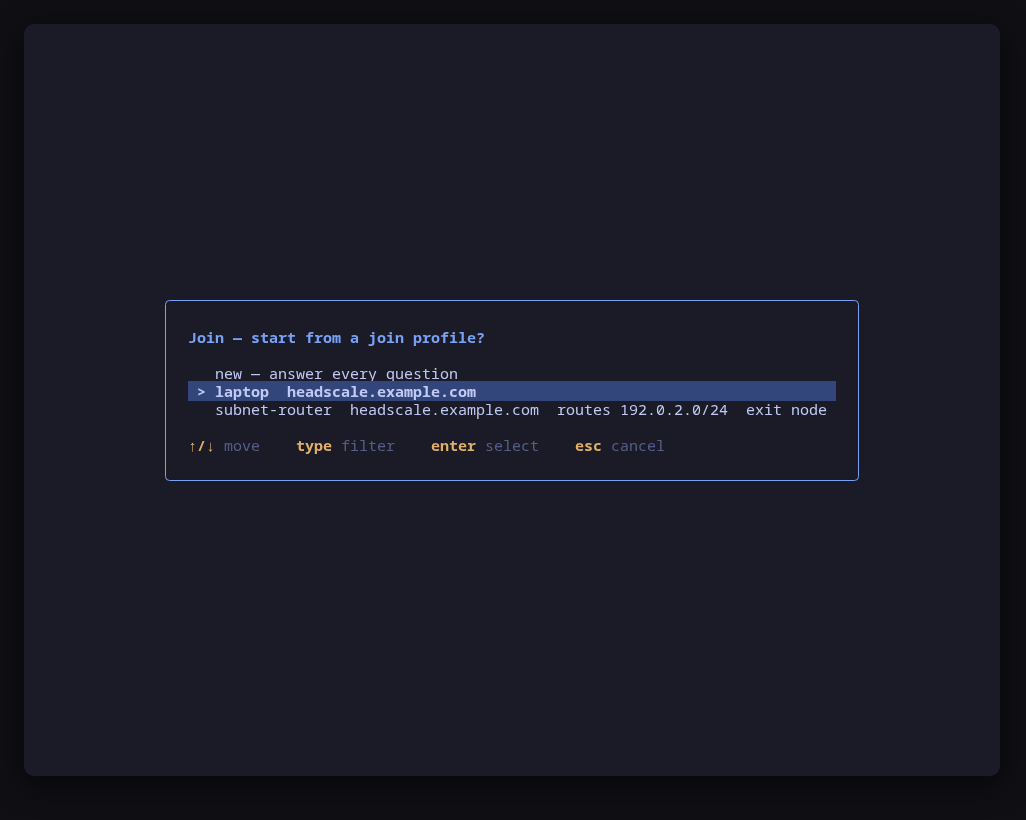
The next j opens with a picker; choosing homelab fills every step, still
editable and still previewed. A profile never holds the pre-auth key, which is
asked for every time.
When it is done
Back on the control plane, the nodes screen (4) lists the client under
homelab. If a node advertised a subnet, r approves it, exactly as in the
public guide.
With every advertised route approved, the readiness line reads
ready · clients can log in and every advertised route is approved.
Two dates to keep: the server certificate expires after 397 days, and the CA
after ten years. tui-cert lists both, worst first, and flags the CA once a
default certificate issued today would outlive it. Reissuing is e again, then
systemctl restart headscale; the clients do not change, because they trust the
CA, not the certificate.
Related guides
- Self-hosted Tailscale with Headscale and Google login: the same control plane on a public name, with Let’s Encrypt and Google.
- A local CA with tui-cert: the CA in depth, including untrusting it and what each finding means.
- Opening ports on a cloud image’s iptables firewall: step 5 on a cloud image.